How I manage my ever growing collection of photos?

Most of the smartphone companies offer some way to store and organize your photos. Google and Apple for example sync all your photos on their own respective cloud services — Google Drive and iCloud. Although these solutions are convenient, they cost you money and the ownership of your data in the long run.
Recently I took a picture of my son with the iPad. The photo came out at the whooping 15 MB, 5 MB for the picture and 10 MB for the movie, which was automatically created before the actual taking of the photo. I suspect that the storage space taken after pressing the shutter button on the latest iPhone is even larger. The cheapest iCloud plan of 50 GB of space costs you ca. 1 € per month (Google's current price is 2 € per month for 100 GB). It doesn’t look like much, but with the size of the photos and especially with 4k videos you can easily reach the 50 GB, and then you will need the next plan. Once you have so much data on a cloud system you may encounter vendor locking issues when trying to move your files from the cloud service.
The main point is not the price but the fact that my photos will be stored in the Cloud, which as we all know is a fancy word for someone else’s computers, with his terms of use and limitations... In addition, in the Apple/iOS case, the most frustrating thing for me is that the photos are hidden in some cryptic file structure, which can be edited only with the Apple's Photo app. Not that I don't like how the Photos app presents my pictures, but the lack of obvious alternative for doing this on a Mac is still an issue.
Getting the photos from my smartphone
In general, I take a lot of photos. Especially of my kids, trying to capture how they grow up in front of my eyes. During the years I‘ve had a lot of cameras, and I still own a DSLR, but my main source of photos now is my smartphone. Since I am not using a Cloud sync service, I am copying on a regular basis the photos from the phone to my computer because I want to store all the photos I shoot on my phone.
On Android, which is the operating system of my current smartphone, the photos are saved in the internal memory of the phone (or on a SD-card) in a path which usually looks like this /storage/emulatated/0/DCIM. Once connected to my Linux laptop it looks like this:
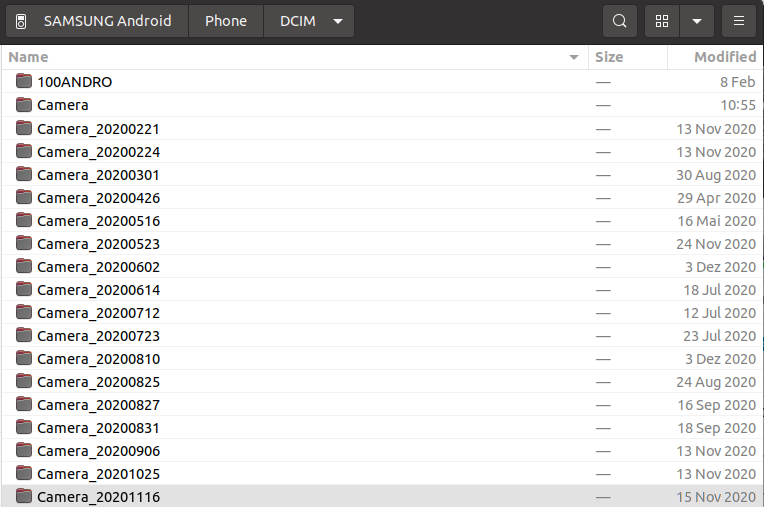
My recent photos are placed automatically by the Camera app in the Camera folder. So I simply take this folder and rename it to Camera_20210929 where the last number represent the current date. Now I am copying this folder to the Photos folder on my PC. By renaming the folder, I know which photos I have already copied and when I have done this. Don't worry the Camera folder will be re-created as soon as you make you next photos. And at least the Samsung Photo app is clever enough to recognize that this folder was renamed so it will show the photos from all the Camera_xxxxxxxx folders.
iOS users: Once connected to your computer, the folder with the photos will be in read-only mode, so you are not able to change folder names. In this case you have to know which was your last copied photo or video.
Organizing the photos on my PC
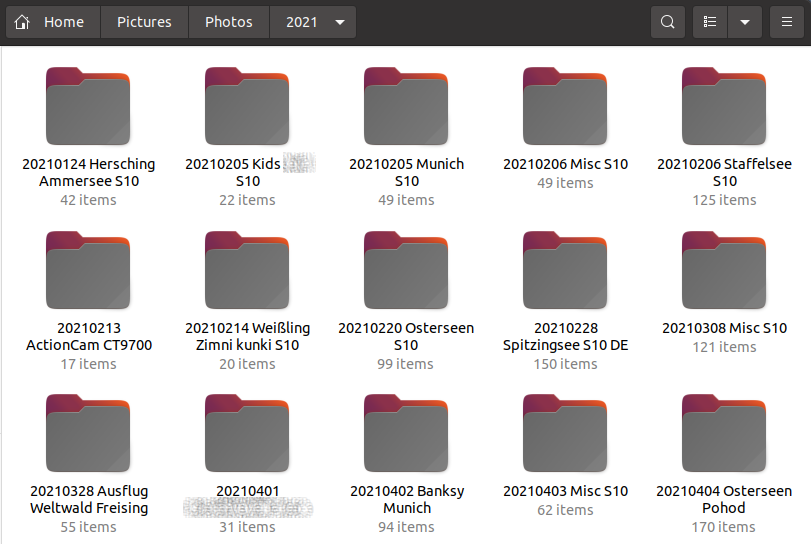
In the Photos folder on my PC the first level of sub folders represent the years. The names of the next level of folders contain basic information for the photos in there. For example 20210517 Birthday Party XY S10 DE or 20210814 Hiking Alps Tirol S10 AT, where the first 8 digits represent the date (or the last date) when the photos were taken. The next few words are short description of the event or the place, then I usually put the name of the camera/phone with which the photos are taken. Optionally, at the end, I put two characters which are the code of the country where the photos were taken.
So after coping the folder with the last photos from my phone, I open this folder with a regular file manager and separate photos from different events in separate folders. After I am done with this, I rename the folder from Camera_20210929 to something like 20210929 S10 Misc. The misc in the name tells me that this folder contains miscellaneous images, since the grouped photos are already moved out of there.
Putting the current date in ISO format (e.g. 20210930 for 30th of September 2021) in the front of the folder name has a practical reason. This way my folders will be chronologically sorted once they are opened in a file manager (e.g. Windows Explorer or Mac Finder), where the default sorting is usually by name.
So for now everything looks pretty standard, at least on Ubuntu and macOS. On Windows you may get at least some preview of the images which are inside the folders.
Preparing the photos in TagSpaces
From here, I continue in the desktop application TagSpaces Lite. This is a free software initially started by me, with the main purpose to help the organization of files and folders on Windows, macOS, Linux and Android.
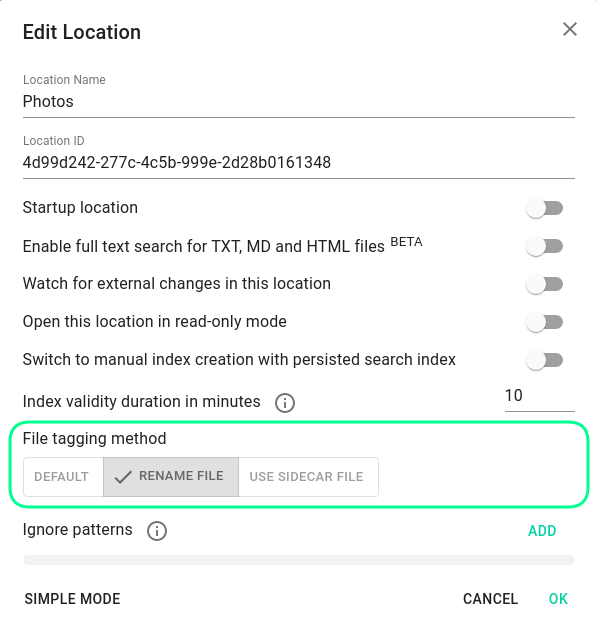
The folder containing my photos is connected in TagSpaces with the options to store the tags in the file name. TagSpaces offers two options for tagging files: by adding the tags in the file name and by using a helper file, which we call sidecar files. These files are in JSON format and are stored along the main file in .ts sub folder. For photos I prefer to store the tags in the name of the file, because this is a more robust way of tagging which "survives" moving the file or syncing it with services like Dropbox. So when I tag IMAGE_4265.JPG with the tags sunset and bestshot it will be renamed to IMAGE_4265[sunset bestshot].JPG. One more advantage is that the tags are usable even outside of TagSpaces. Just use the built-in search of your operating system to find files tagged this way. The file tagging method can be specified per location in the location properties dialog, shown in the next screenshot.
Generate photo thumbnails
Once the photos are split into folders, I open them in TagSpaces and the app generates thumbnails (small image previews) from the photos, so I can easily preview them the next time I open this folder. Depending on how many images I have in a given folder and how big these images are, the process of thumbnail generation can take some time. I usually do not have folders with more than 500 images, so the time for the thumbnail generation on my laptop is acceptable (< 30 sec).
Choose thumbnail for a folder
After the thumbnails are generated, I choose one of them as a thumbnail for the currently opened folder. This is done by opening the context menu with a right click of the selected file and choosing "Use as thumbnails for the current folder" from there.

Manually tag and add descriptions
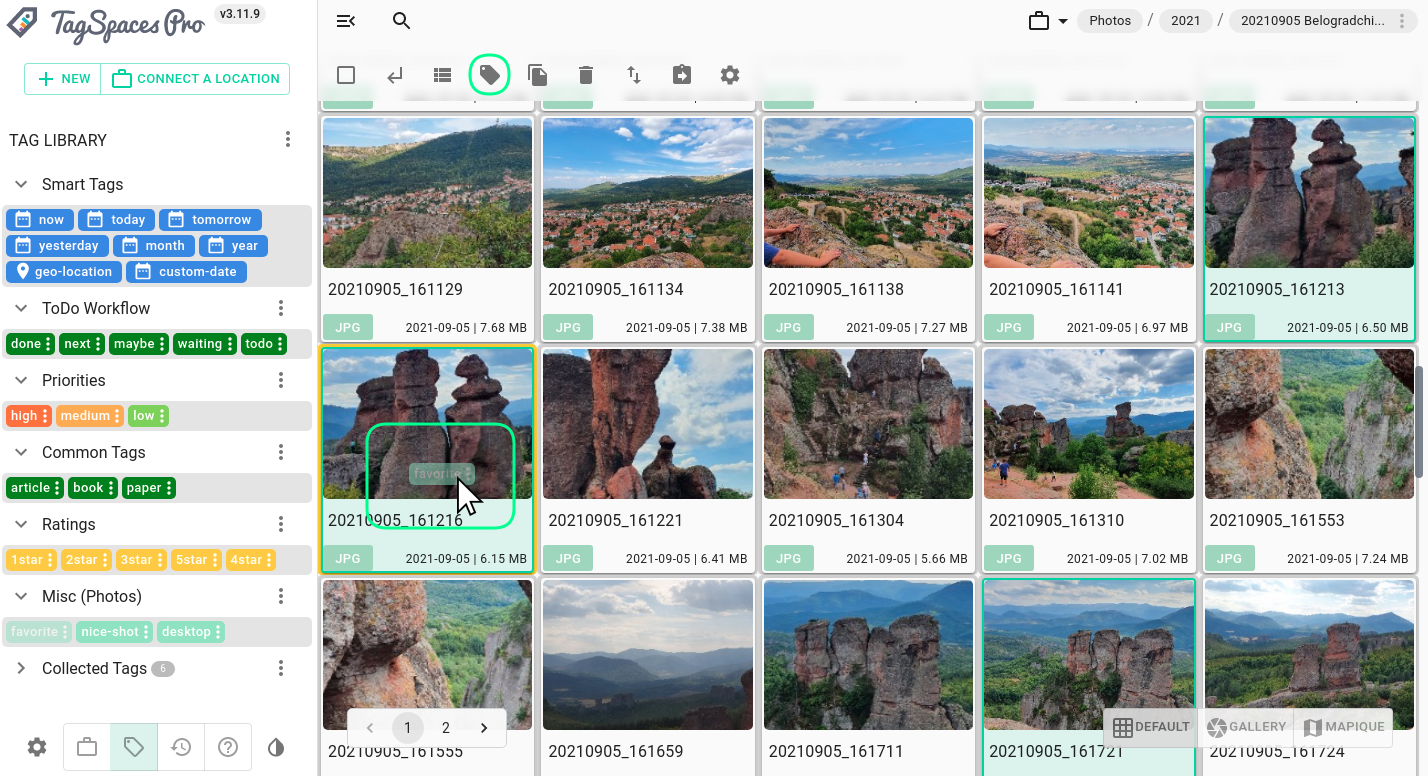
Now is the time to tag some of the photos. This is, of course, an optional step, where I do not spend too much time. In general, I try to find the best images in the folder and add the tag favorite or bestshot. If I find a special shots of my kids, I tag those photos with a tag referring to the kid's name. This way I am able to find the best shots of my children for a given year very easy with the search functionality of the application.
The tagging can be done in different ways. In general I use the drag and drop functionality as seen in the following screenshot, where I have selected three photos and I am dragging a tag over the selection. For touch screens there is a tagging dialog, which can be opened by clicking the button with a tag from the toolbar (shown in the same screenshot).
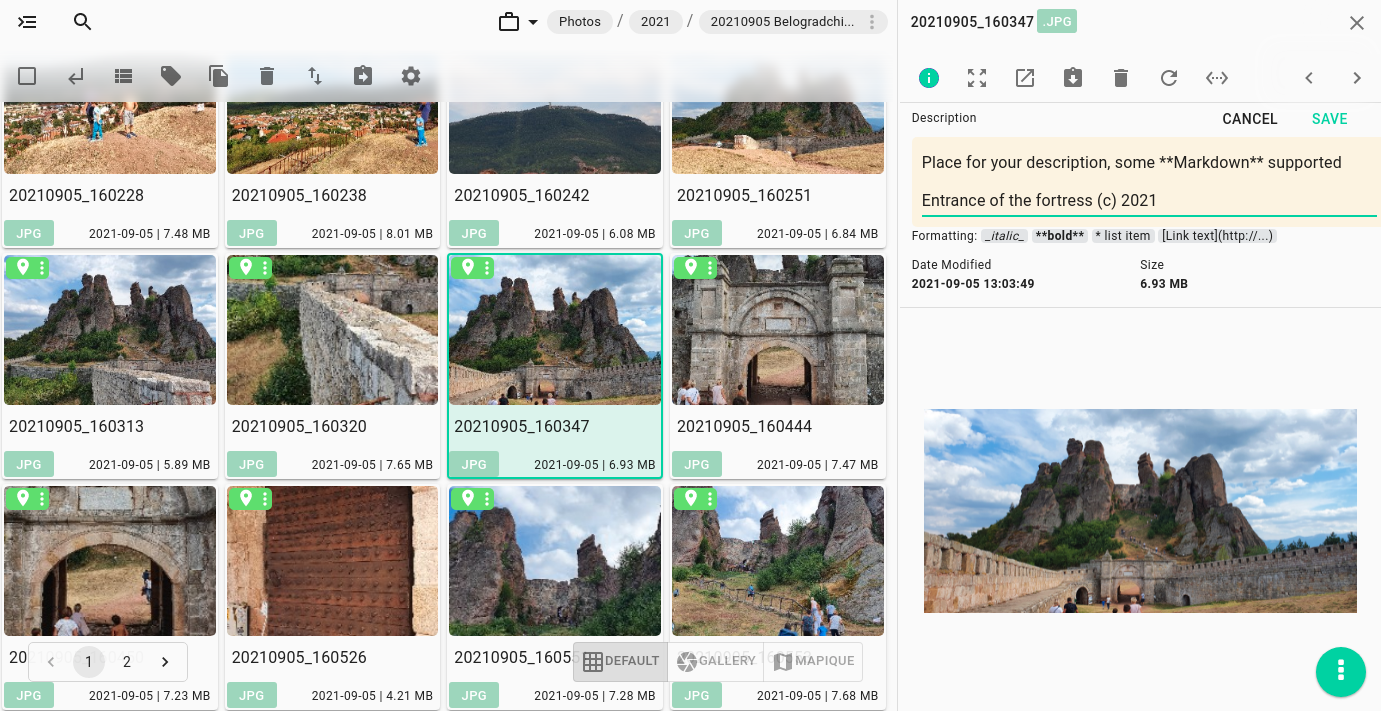
For some special images, might be worth adding a description. This can be done in the file properties area of the app. Basic markdown is supported in the description of the files and folders there.
Extract geo coordinates from JPGs
I have turned on the storing of the current geographic coordinates (latitude and longitude) as EXIF/IPTC data in the JPG files on my phone. This allows me to extract these coordinates later and present them nicely in TagSpaces PRO. The PRO version of the app features the Perspectives, which allows me to present the files in a folder with different view depending on the use-case.
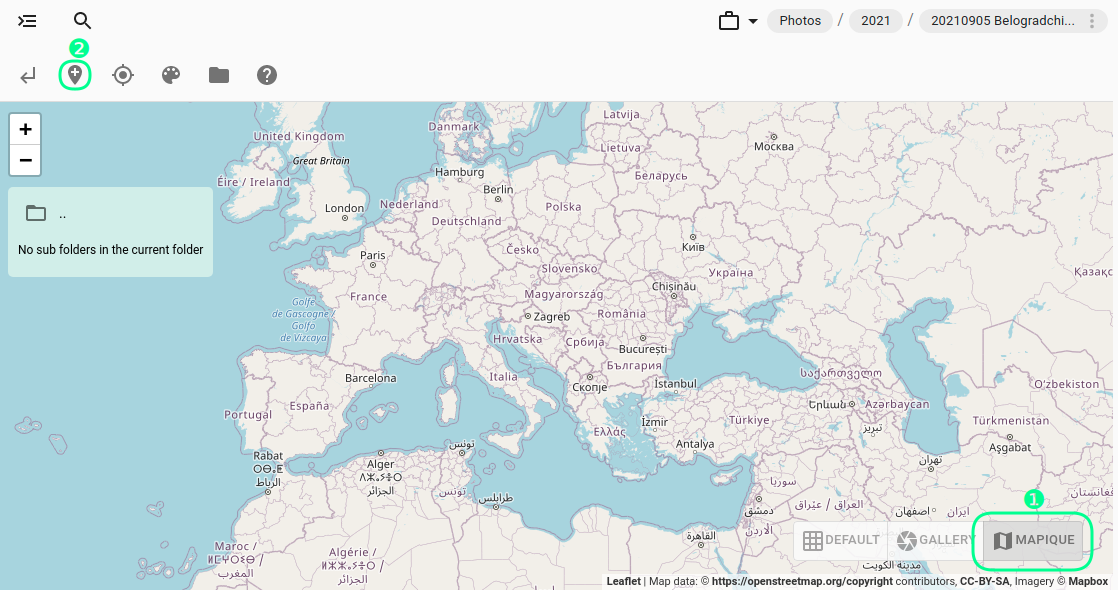
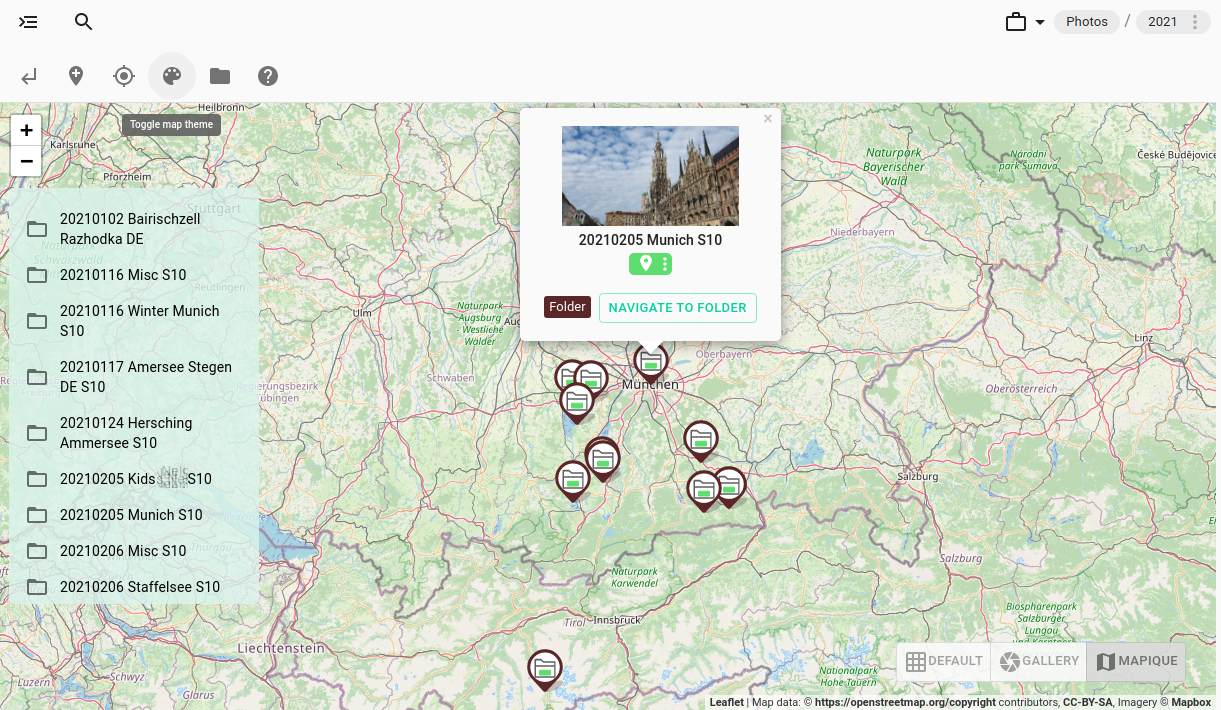
So now is the time to open the folder in the Mapique perspective, dedicated to visualize geo tagged files and folders on a map. This can be done by clicking the button marked with (1) in the following screenshot. Clicking on button marked with (2) will start the extraction of the geo coordinates.
The extraction takes some time depending on how many JPG files you have in the folder. After it finishes, the map will be automatically focused to the place where the photos are taken. All the photos with geo coordinates are now tagged with a geotag and represented as small markers on the map. Clicking on a given marker will open a small preview of the image.
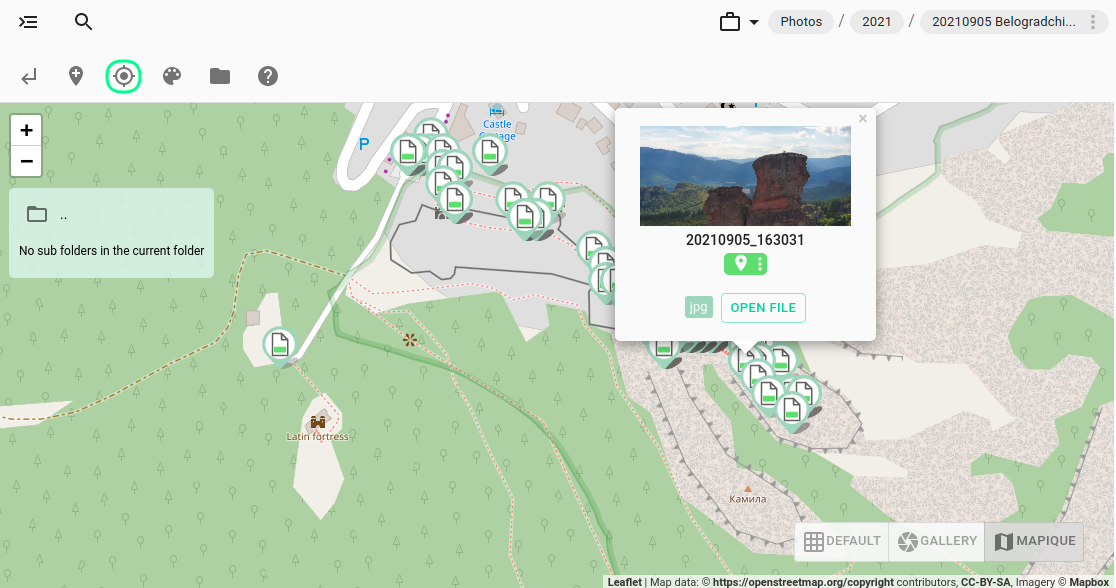
Geotagging Folders: As an additional step you can tag the current folder with a geo-tag pointing to the current center of the map. This can be done with the button marked in the previous screenshot.
Browse the photo folder in different perspectives
As a result of the steps so far, now when I navigate to the parent folder, which in my case is 2021, I will see all the sub folders with previews, so I can easily recognize their content and have a nice overview of my photos taken so far in the year 2021.
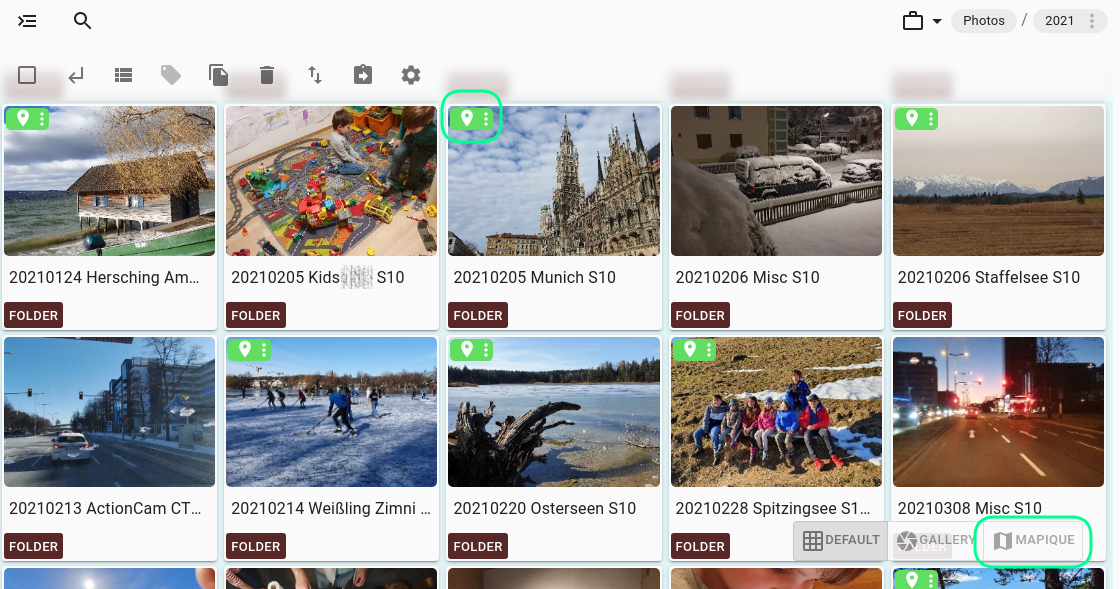
The geotagged folder will have a small tag with a marker icon, as seen in the screenshot. Having those tags in place, when I switch again to the Mapique perspective I will get a map presenting the places where I have taken the photos.
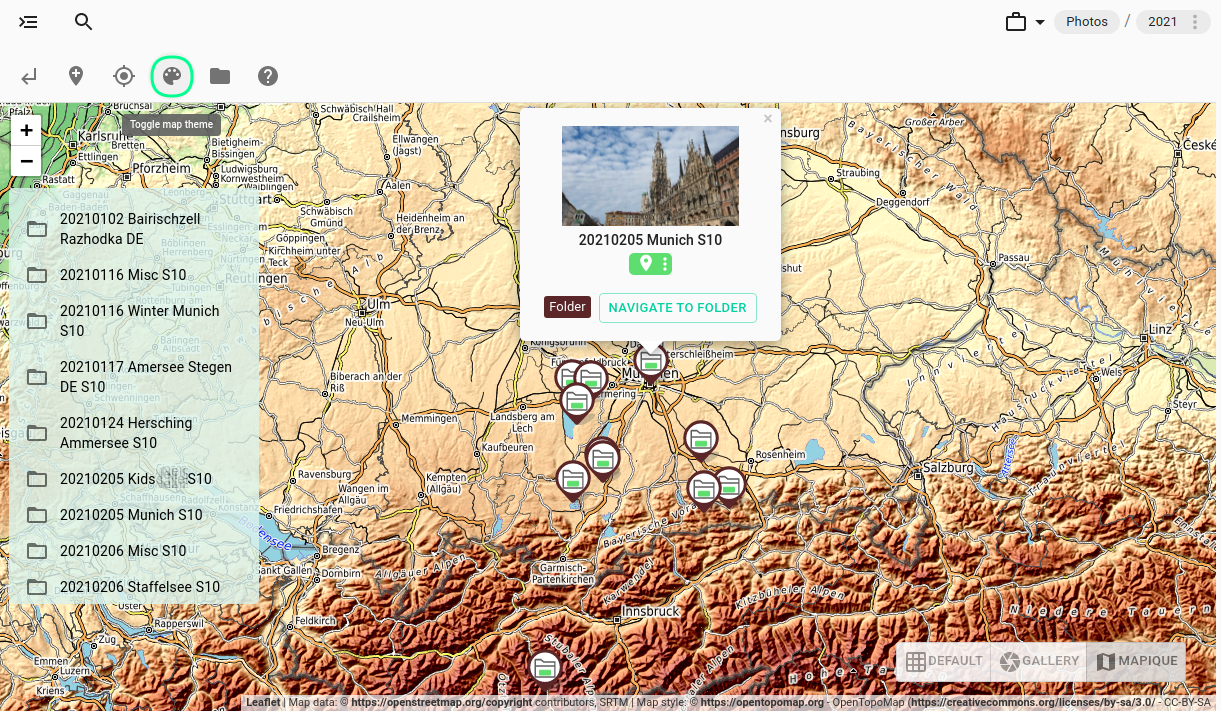
Another feature of the Mapique perspective is the additional setup of map tile servers, which will render the map with different styles. The styles can be switched with the button emphasized on the next screenshot. Here we see a topographic map which is generously provided by opentopomap.org and openstreetmap.org.
You can navigate to any sub-folder by clicking on Navigate to Folder button in the popup. Or you use the folder list on left, which contains all the sub-folders and not only the geotagged ones.
Backup of the photos on a NAS (Network-attached storage)
The SSD of my laptop is unfortunately not of infinite size, so I was forced to hold only photos from the current year and the previous two years on my laptop. Images from the other years are stored on my NAS. From time to time, during the year, I am syncing the folders containing the photos from the current year to the NAS system, so I have a backup copy of the already organized folders. Speaking for the NAS, mine is of a popular NAS brand, containing two hard-disks in RAID 1 mode, so nothing fancy.
Sharing my photos with TagSpaces Web Pro
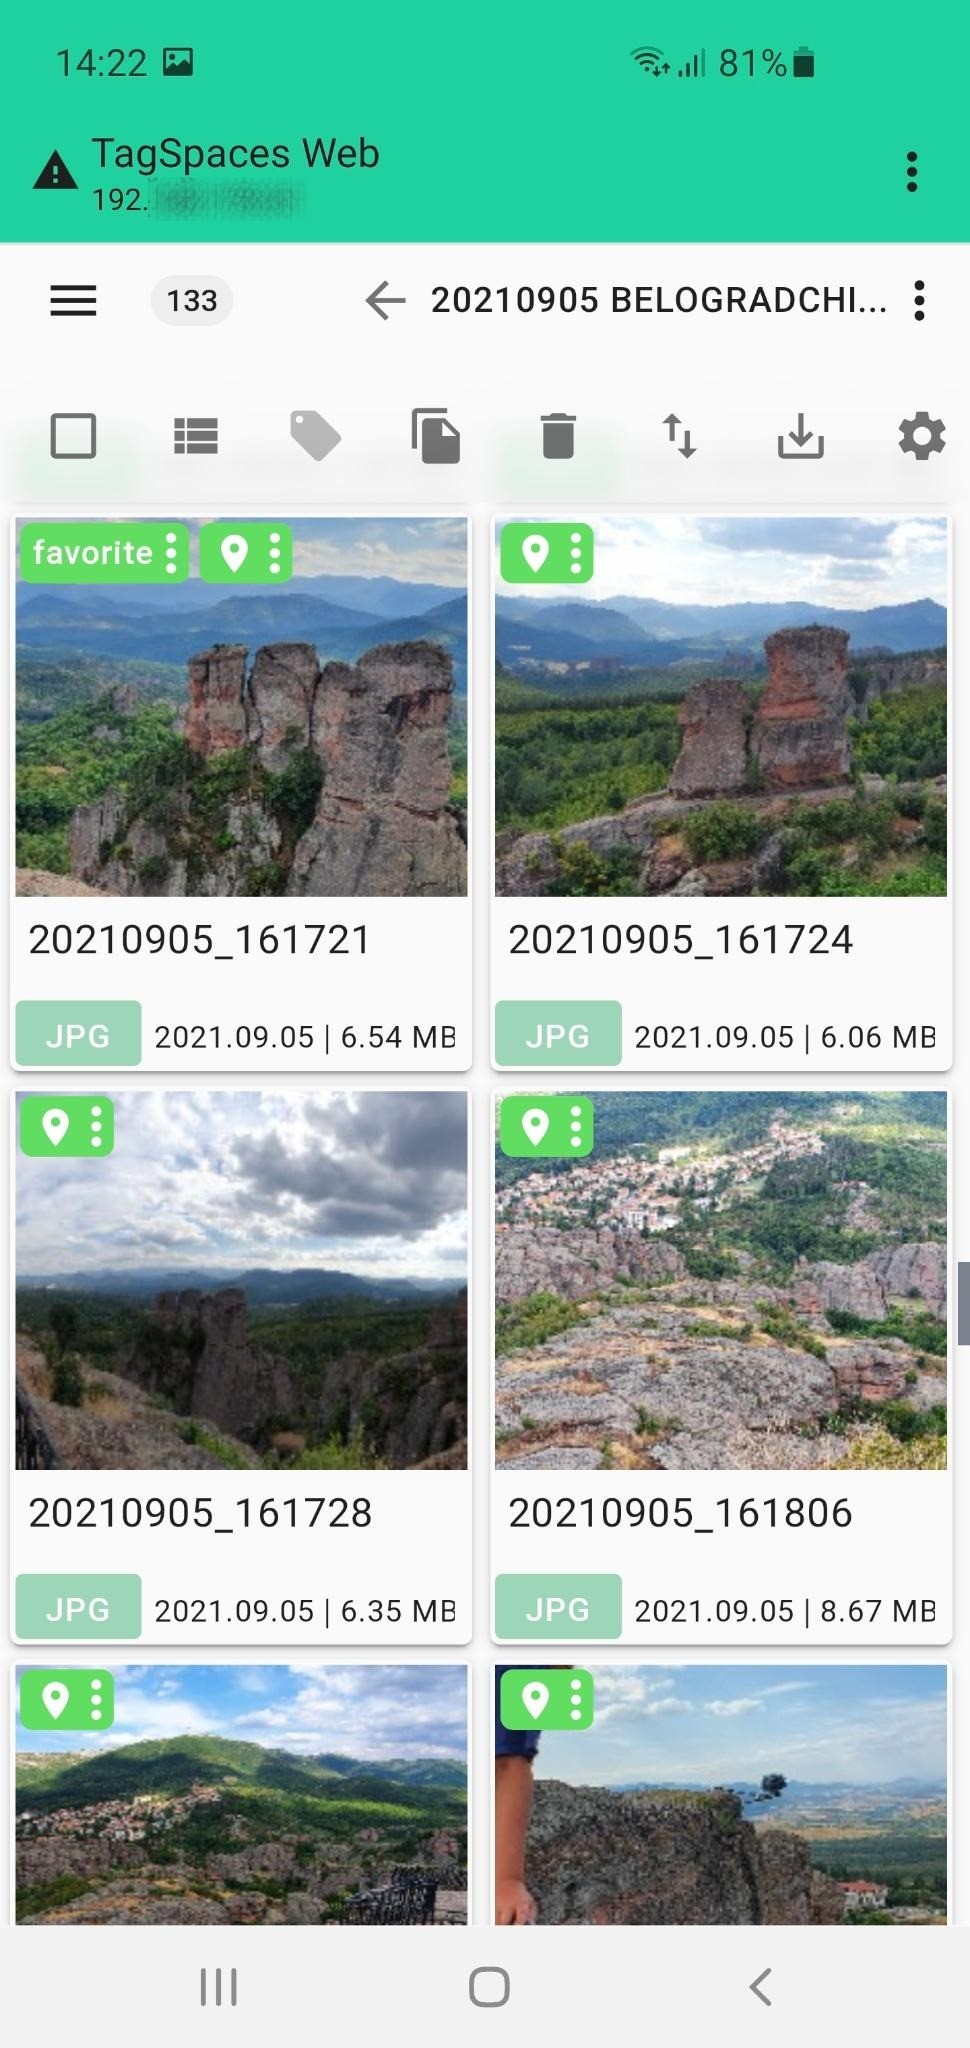
Besides holding my entire photo collection, my NAS has another function. It runs a MinIO service in a Docker container and hosts an installation of TagSpaces Pro Web, which is the web based version of TagSpaces. MinIO is a service which can display folders as AWS S3 compatible object storage. As such they can be connected in TagSpaces Pro Web. So my main photo folder containing the folders with all the years so far is displayed here, which makes it easy to browse on my mobile phone and tablet.
You can make you NAS accessible over VPN from the Internet. This will give you access to your photos on computers, tablets or mobile phones from everywhere.
With the combination of TagSpaces’ organization of files and NAS storage, I have something similar to Google Drive or Apple’s iCloud but running entirely on my hardware with my software and hosting all the files I need for free. No files of mine are hosted on other proprietary networks and I am in complete control of my own content.
Since my photo folder is reaching 1.5 TB, I would be charged by Google or Apple with 9.99 € per month if I want to host my files on their cloud services. My NAS and my DSL connection might have different SLAs compared with the Big Tech but that’s not the point if you really want to own your files, now is it?
The NAS and the integrated hard drives have, of course, their price. We should also not ignore the the time I invest for keeping the things there running.
Long-term archiving on M-DISC Blue-rays
Since my NAS is always on and connected to the Internet, it should not be used as a backup system. Ten years ago it was enough to burn my photos on CDs or DVDs but this is not feasible anymore due to the size of my yearly photos folder. So I started to search an alternative for my long-term backup strategy.
I came upon the M-DISC technology, which is basically creating special Blu-ray discs. Here the data layer is made from a material, which according to the producer can hold the data for up to 1000 years. This sounded very promising, so I bought an external, M-DISC certified Blu-ray burner, because the only BD-device at home was in my son's Play Station. Writable media are available in 25, 50 and 100 GB. I usually take the 50 GB, since the idea of a potential loss of 100 GB, regardless of the reasons, scares me. The good news is that the M-DISC can be read by almost every Blu-ray device, the bad news is that I do not know if there will be a working Blu-ray reader in let's say 20 years.
In conclusion
The best thing of using files and not external services is that my photo folders are self-contained, carrying all the information like tags, description, geo-coordinates and thumbnails. I can just copy any folder, from a given year or just from some "events" put it on a USB stick or sync it with e.g. Nextcloud or Dropbox and I will have my organized and enhanced photos on another computer. And, if the other computer has TagSpaces installed I will have the same experience with my photos there.
If TagSpaces is not on the other computer, I will "just" have a backup of my sorted in folders original images and not some downscaled versions (optimized for viewing on mobile devices or with removed EXIF data), which I can still open with the built-in image viewer in operating system of the other computer. All this, without the need of exporting and importing files from online services or migrating databases with metadata.
Please let me know what you think about my photo managing routines. I am open for improvements and other suggestions.
My next article will explain, how I build my personal Dropbox alternative and organize my notes, bookmarks and general stuff found on the Internet, so stay tuned for a follow up.